Wednesday, November 4, 2009

Some resemblance of a motorcycle...

****Note- All images are very large, you will have to click on them to view in detail (Yes, I'm too lazy to re-size them)*****

I put the rear swing arm back on, forks back on and mocked up the tank and seat pan... Now the fun part starts!


Does it look like a motorcycle yet?
Photobucket

Photobucket

How about now?
Photobucket

Photobucket

Forks and tank clean-up

As with everything on this bike... Everything was either covered with grime, oxidation or en excessive amount of poor-quality paint. (usually some variation of all three)

And, yes. I know the forks need new seals. It's not that I'm too lazy to do it myself- it's that I'd rather have them done at a shop once I get it all put back together..

The forks, disassembled and getting cleaned/brushed....
Photobucket

Photobucket

Photobucket

The forks all brushed and back in order.....
Photobucket

The gas tank needs to be sealed inside still.... But, after sanding away to no avail due to the incredibly ridiculous amount of brushed on paint that was on the tank, I decided to go with chemical paint removal.... worked out nicely and quick too!
Photobucket

Photobucket

Engine makeover

The engine is free, and it's clean inside. Kyle and I pulled the covers, kick-start, carbs and plugs and did some research on the timing. It seems that everything is in order, except the fact that it looked like hell after sitting for so long.

So, after many hours of cleaning and removing the aluminum oxidation, I prep and paint.

Still prepping/ masking.......
Photobucket

Photobucket

Masked, and paint in progress.....
Photobucket

Photobucket

Photobucket

Photobucket

Photobucket

Finished product. (before reassembly)
Photobucket

Photobucket

Wheels

Being strapped for cash means not being able to afford the luxury of bead blasting or powdercoating what you want to have done... So, the next logical solution is a lot of elbow grease, and some rattle-can enamel..

Rear wheel as it was when I pulled it off the bike.
Photobucket

Rear wheel as it began transformation. Notice the aluminum oxidation and overall 'gross factor' of the surface.. Note, after some hard work, the lower left portion of the wheel looks quite a bit shinier than the rest of the surface.
Photobucket

After hours of cleaning and masking, I devised a coat-hanger rigging on the garage door to begin painting. For this, i chose a gloss enamel to offset the flat black of the frame.
Photobucket

Photobucket

Another view of my redneck ways- hanging the wheel from the garage door in the apt. complex.
Photobucket

Tuesday, October 6, 2009

Custom fiberglass seat pan!

So I decided that a.) The project bike didn't have a seat to begin with, and b.) Even if it did have a seat, I would have to heavily modify it to work with the shortened rear end- I would make my own seat pan. After a quick search on the web, I found this site:http://www.jeffreyphipps.com/seat_pans.htm and followed the directions step by step.

I was excited to try it, and even without and fiber-glassing experience, I somehow managed to trial and error it to the finished stage.

Unfortunately, I didn't take any pics in the 'during stage' of this project, but I'll walk you through it.

1. I taped off the rear end of the bike, just as in the instructions. I used a cardboard base for the form.
2. Once I was happy with the tape, I laid down some aluminum foil, shiny side up. (cheaper than the aluminum tape, but probably not the best compromise since it is alot thinner.)
3. Once the aluminum foil was in place, smoothed out and taped down, I applied a few coats of car wax. (Which didn't work as well as the mold release wax would have)
4. I cut out several pieces of fiberglass mat, and mixed my first batch of resin. Needless to say, I put way too much hardener in the mix, and it hardened up within 5 minutes. The second batch, I used half as much hardener, and it lasted about 10 minutes. So in the successive batches, I used less and less hardener. I never really got it right, as the last batch actually took a few days to cure.
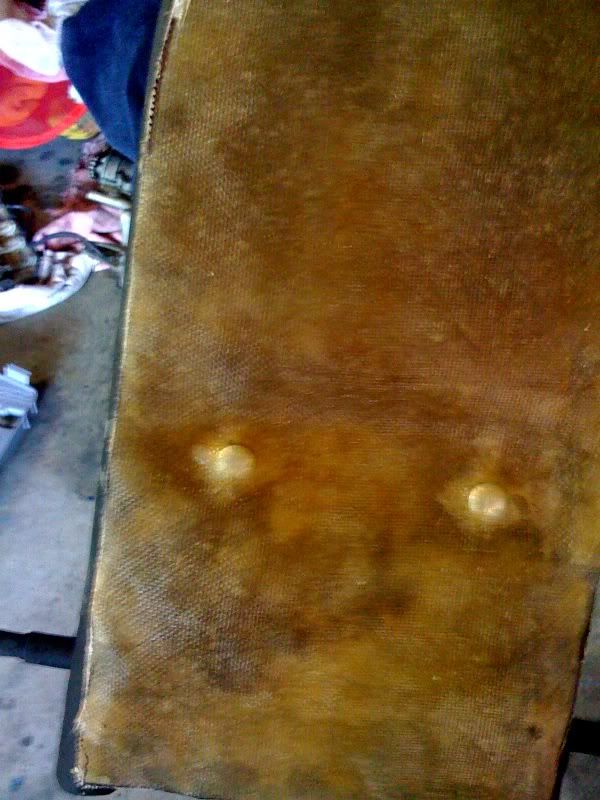
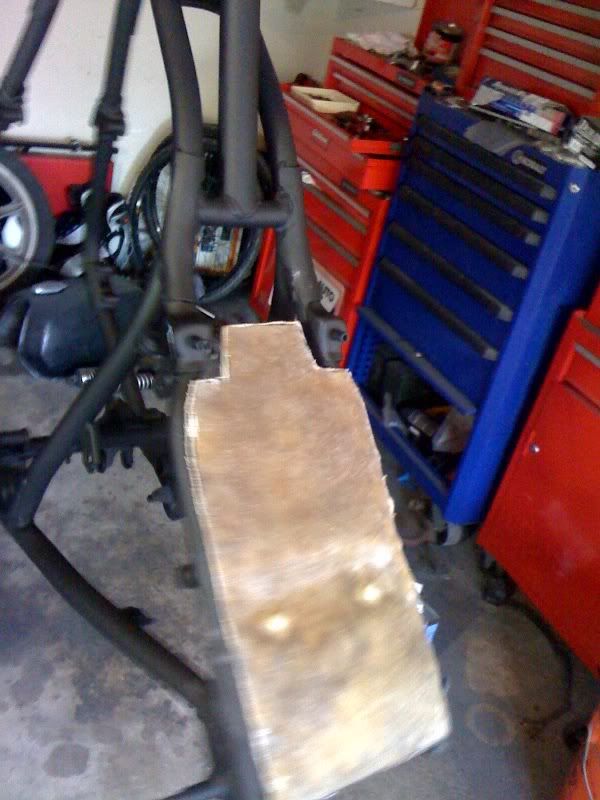
5. Once the mat was cured, I made a trip to Lowe's and picked up some bolts to glass into the pan so I don't have to worry about the seat flying off. I drilled the holes, sunk the bolts and glassed them in with another 2 coats of mat before finishing it off with fiberglass cloth.

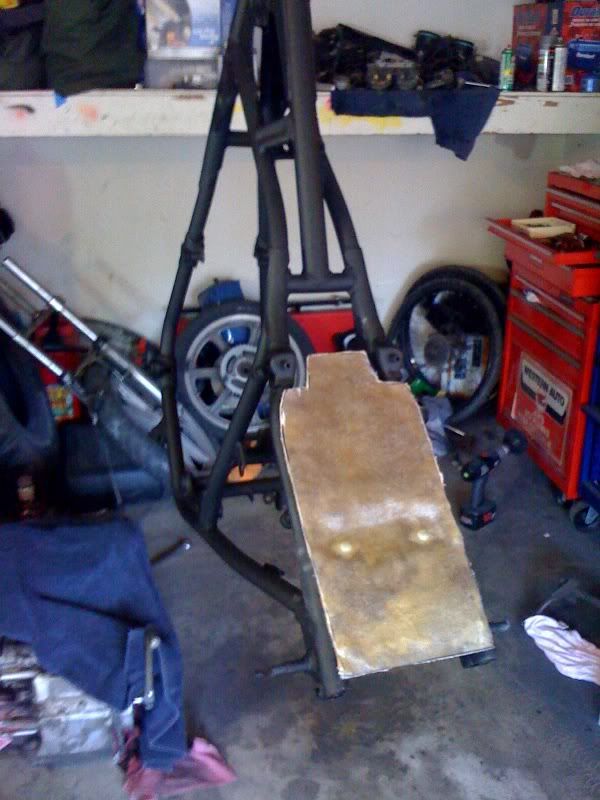
The whole thing looked like a giant mess, and I was sure I completely messed it up, but once it was cured, and I trimmed it to fit, I am actually happy with the end result. Pics:
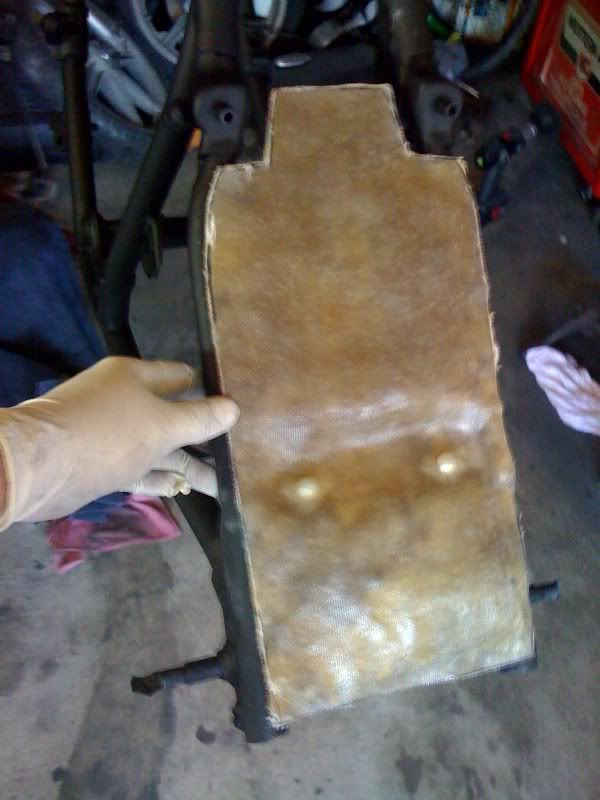
The seat bolts glassed in.....
GLASSED IN SEAT BOLTS
Fitting the seat pan.... (Note use of gloves to keep that crud out of my hand)
FITTING SEAT PAN 2
More...
FITTING SEATPAN 1
Bolts thru bottom of pan and into frame...
SEAT PAN UNDERSIDE WITH BOLTS

SEAT PAN
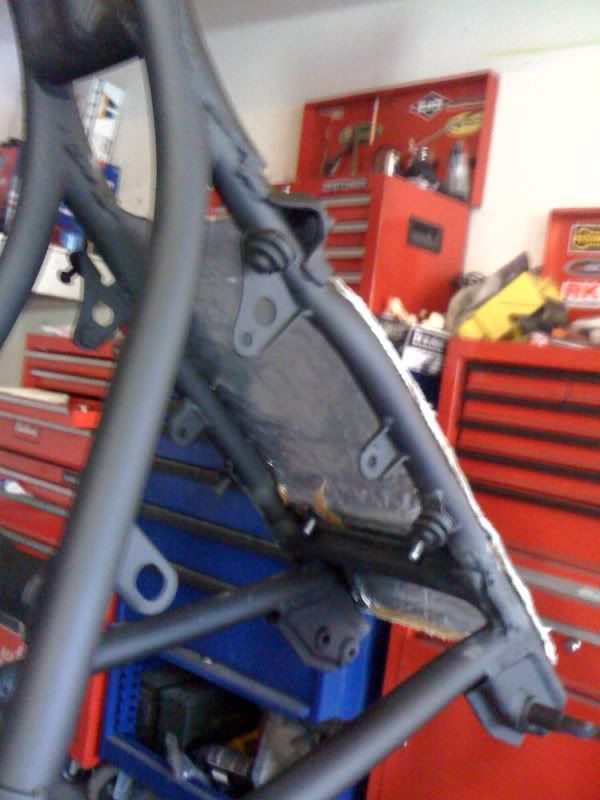
Finished seat pan. Fit is right, now it's time for foam and covering. Haven't decided on what to do with it just yet but I have time.
FIBERGLASS SEAT PAN

Primer and paint

I chose to do 2 good coats of gray primer, giving it about 2 hours to cure between coats. Let it cure overnight before applying paint first thing in the morning. Satin black is the color of choice for the frame. It's simple, and I think it gives it a nice clean finish.

PRIMED

PRIMER 4

PRIMER 2

PRIMER

PRIMER 3

PAINT 1

PAINT 2

PAINT 3

PAINT 4

PAINT 5

PAINT 6

PAINT 7

As you can see, the body filler certainly cleaned up the rough spots.....

Paint prep.

Front end is off, center stand is off and the bike is cleaned up. got the body filler in place. Some last minute sanding, an Acetone bath and this baby is ready for some primer. I devised a nifty metal hanger rig to get the bike off the ground to get the purdy work going.

PREP

PREP

PREP/ FILLING 1

PREP/ FILLING

Gettin 'dirty'

Plenty of grime to go around. It was suggested to use some Aircraft stripper to get the paint off. I'm on a limited budget, so I'm going the old fashioned way, that- plus I really wanted to occupy my time, so the hard way it is. Sandpaper, grinding wheel and sanding wheel.

A little rough in the rear end. Cut-off the 'helmet lock' and some unused tabs.....
Photobucket
Gettin the old grubby paint and grime off...
Photobucket
As you can see, the "hoops" are now gone. (Once supported the passenger pegs- But this is my bike, and I'll be going solo)
Photobucket
Rear swing arm is also off. Better side view showing the progress with the paint stripping. Next to go is the center stand....
Photobucket
Front view.
Photobucket
Left side. (Sorry for the blurry pics)
Photobucket
Top view.
Photobucket
A better one of the left side. I was considering stripping it down, then shooting clear over it and go with a 'rat' look. But there are way too many imperfections to do that for my liking. So they'll all get filled and painted over.
Photobucket